
Ben Eckert, Sculpture (MFA), 2025
Ben Eckert is an artist hailing from San Francisco, CA. He works primarily with building materials, and uses traditional as well as digital techniques to create his sculptures. As an MFA candidate at Maryland Institute College of Art, Eckert is scaling his artwork up to create public sculpture, immersive installations, and architectural interventions.
Skill Building
A series of technical exercises build and demonstrate skills in Rhino, laser cutting, 3D printing, and CNC routing.
Rhino
files:
Laser Cutting
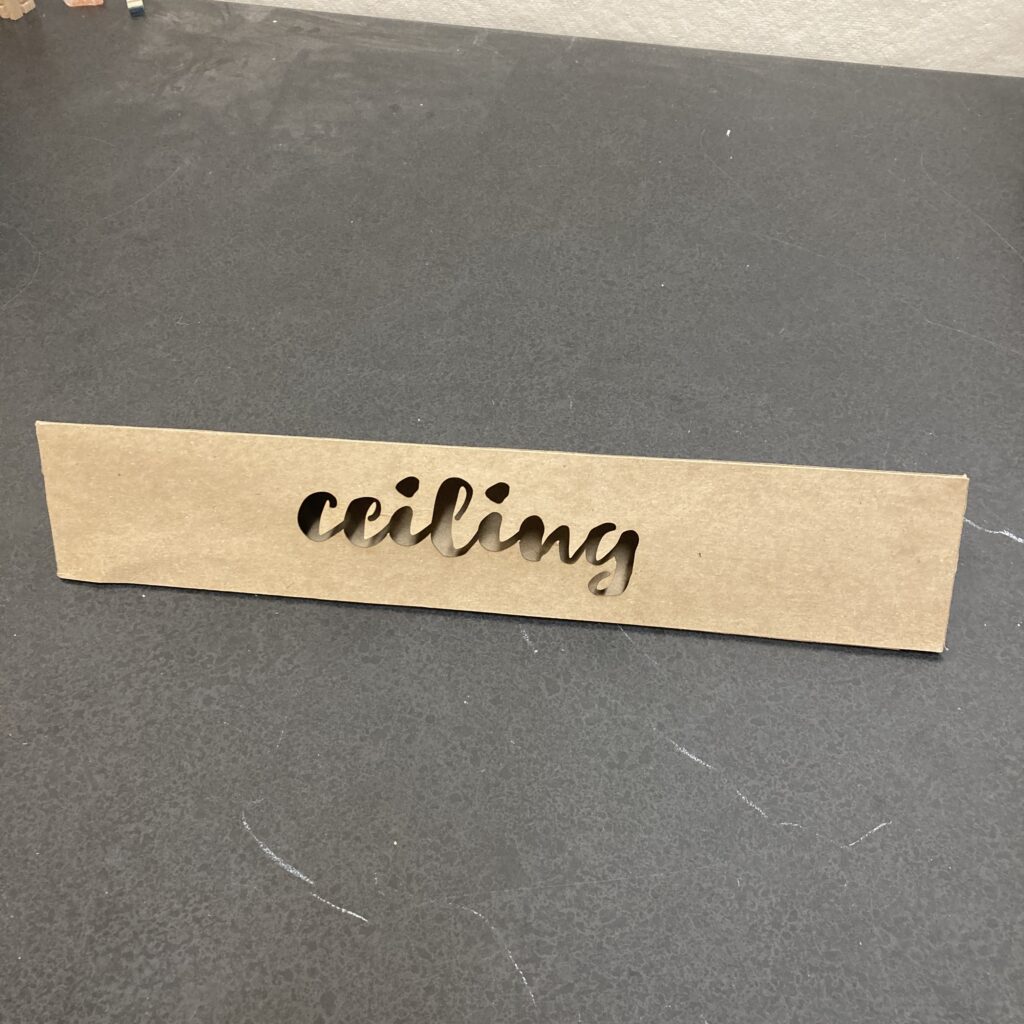
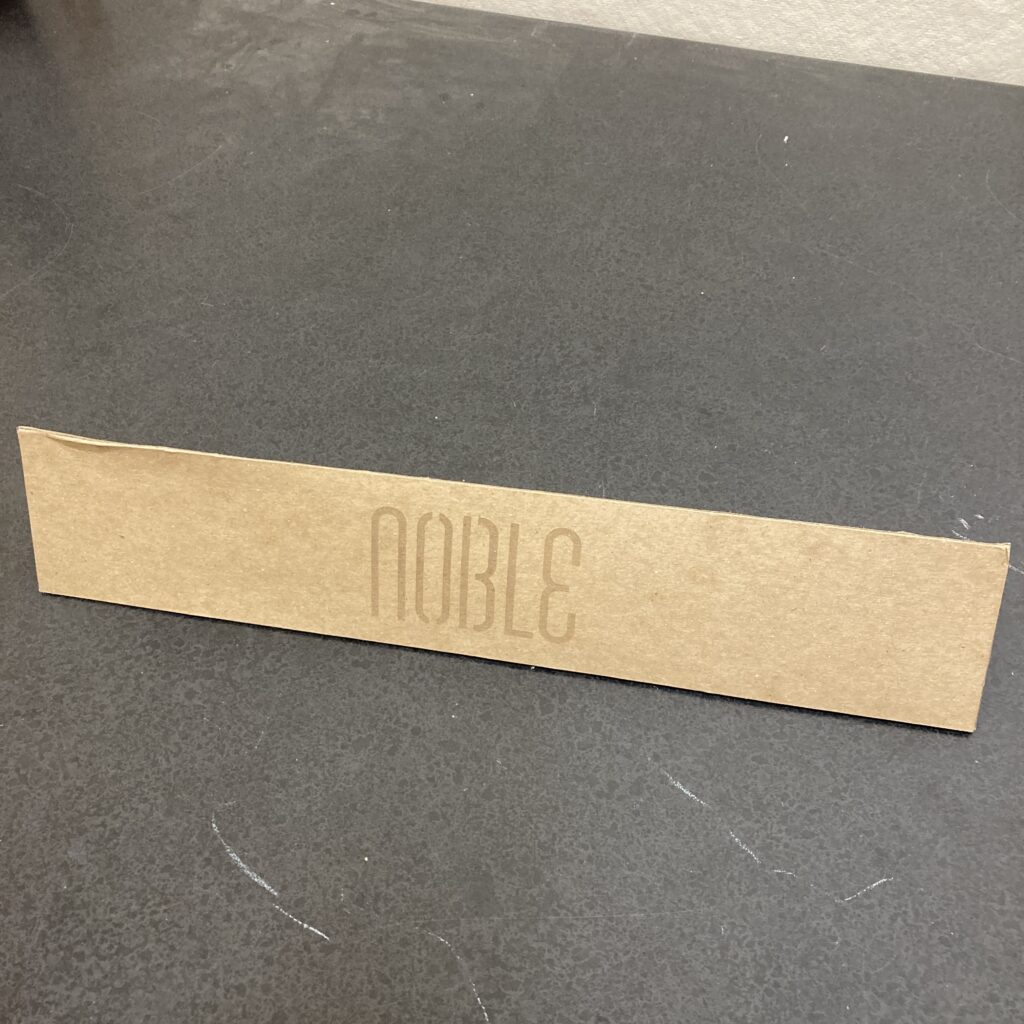

files:
3D Printing
files:
CNC Routing
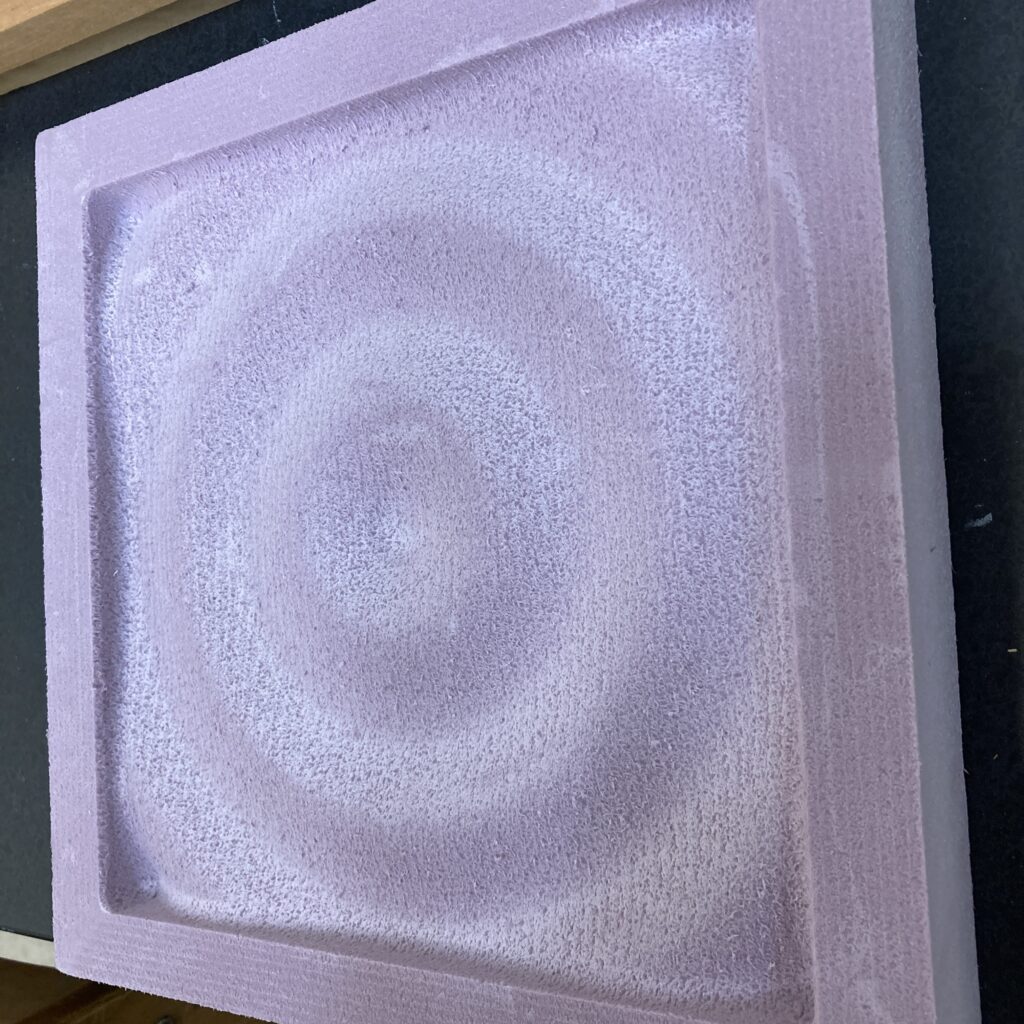

files:
Project I: Lamp
Calling on architecture, cityscapes, traditional Japanese lanterns, and carpentry, this piece takes a design I use often in my sculpture making practice and turns it into a functional lighting element that can be used to illuminate an interior space, or as outdoor lighting. Employing laser cutting, as well as hand building and gluing, I seek to use modern digital making techniques to generate my material along with traditional craft work to bridge past and present.


Process
By designing my layout first on the computer, I was then able to laser cut my material (first image), then I glued the laser cut panels to Shoji paper and assembled everything.


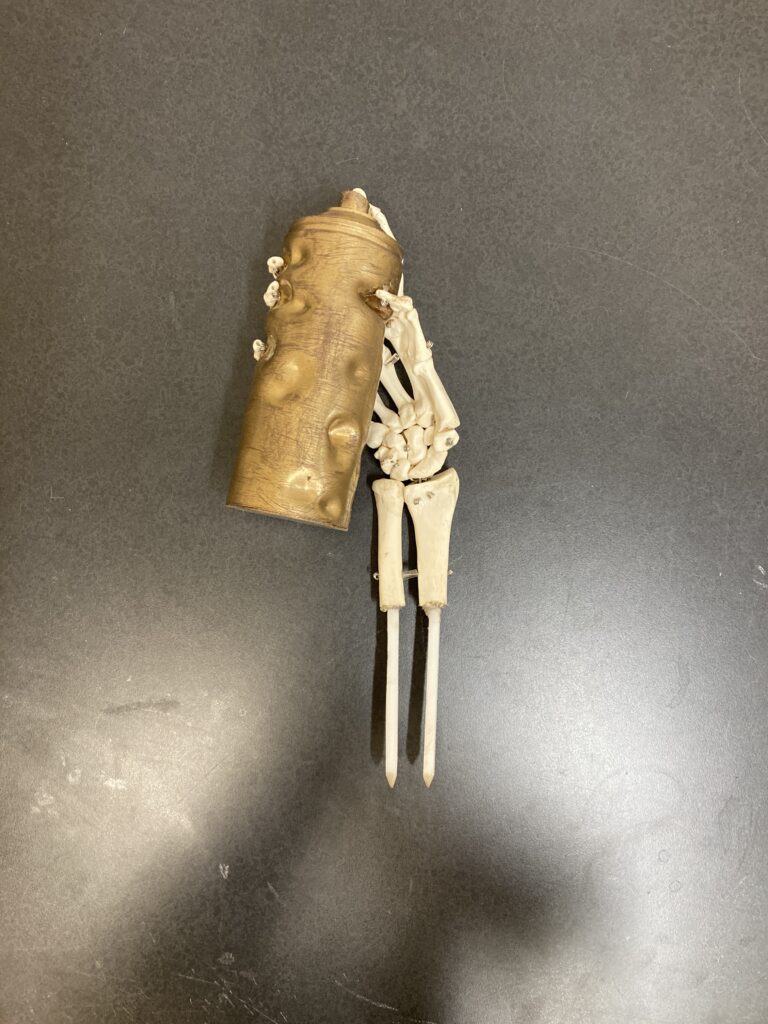
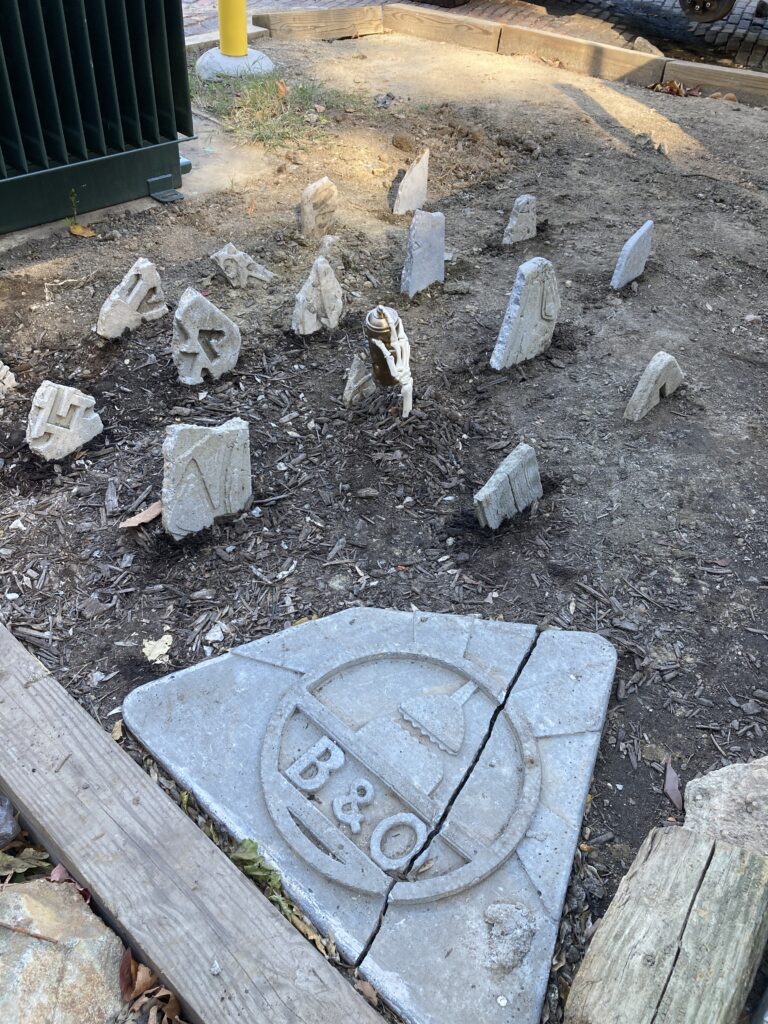
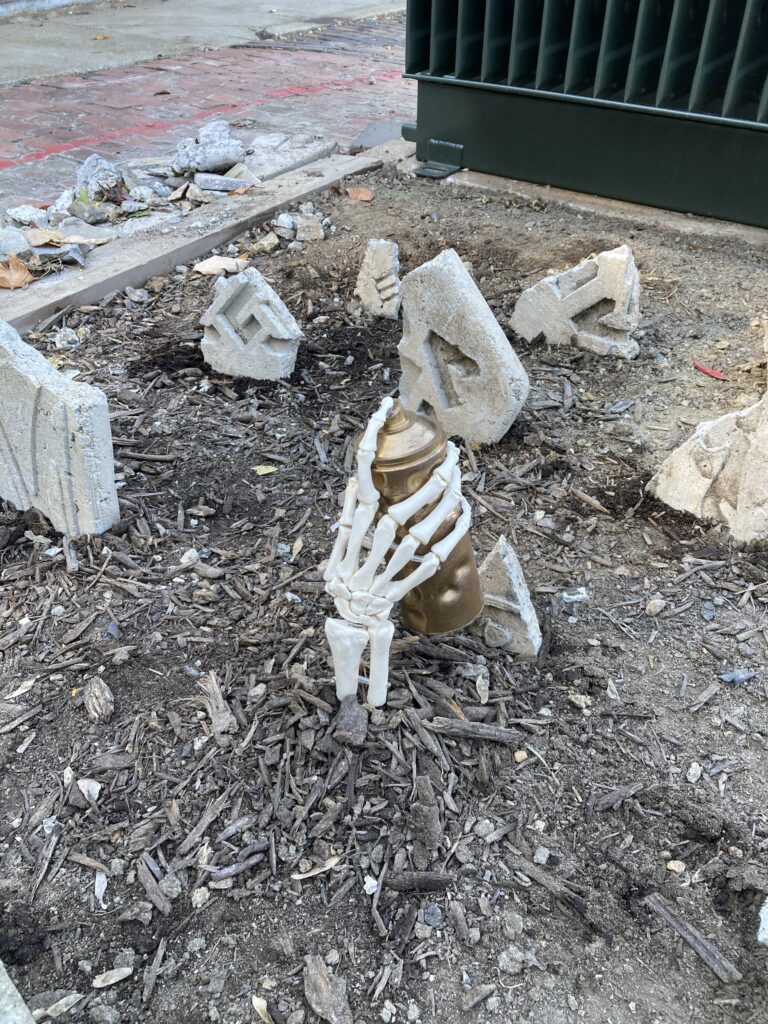
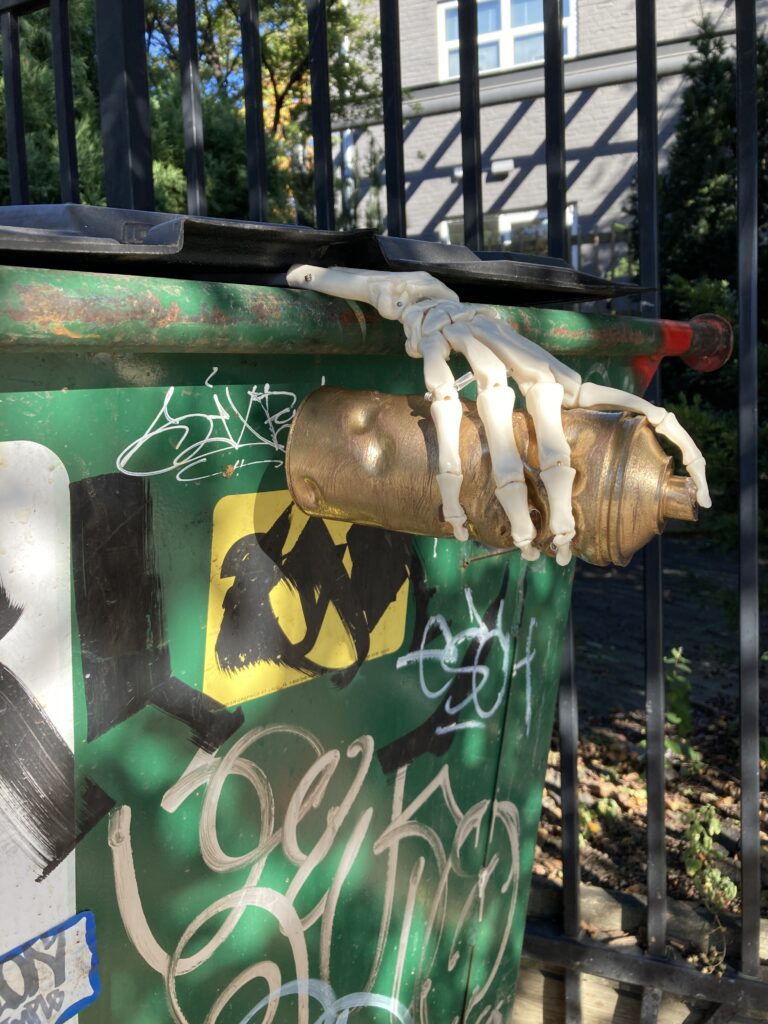
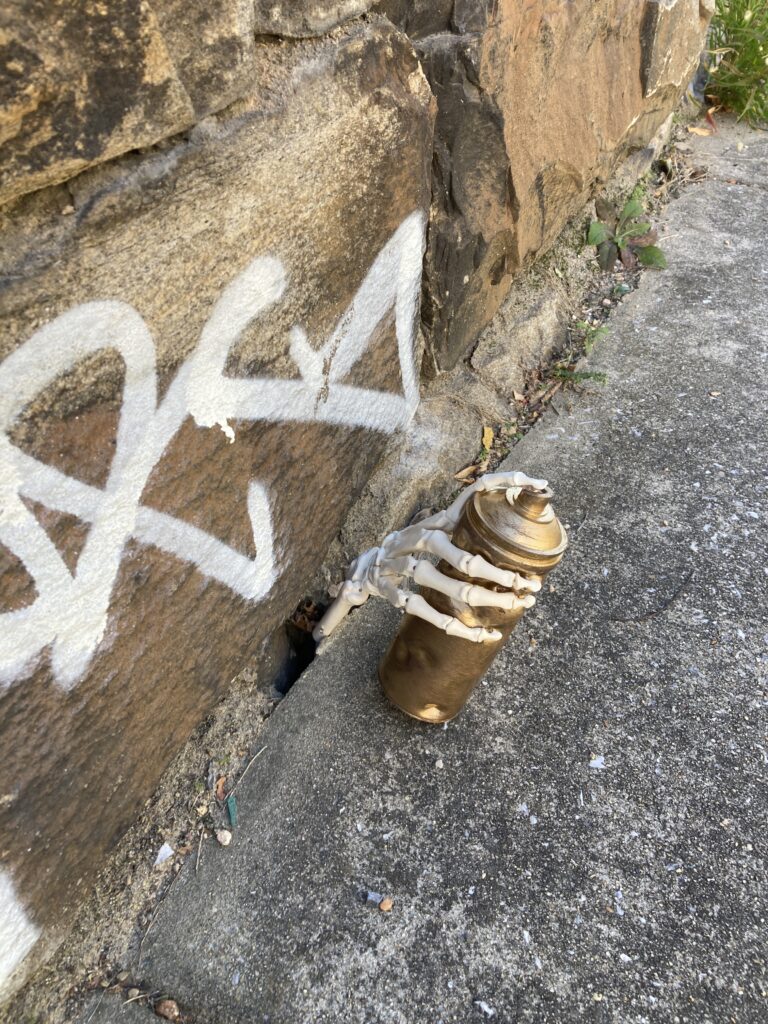
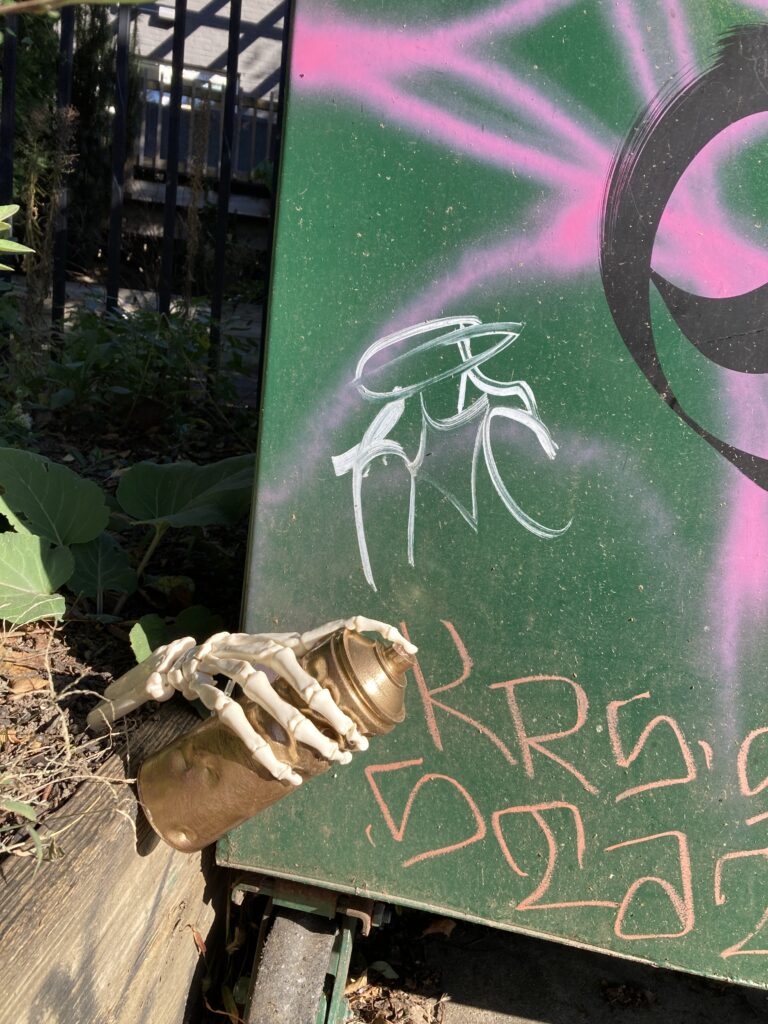
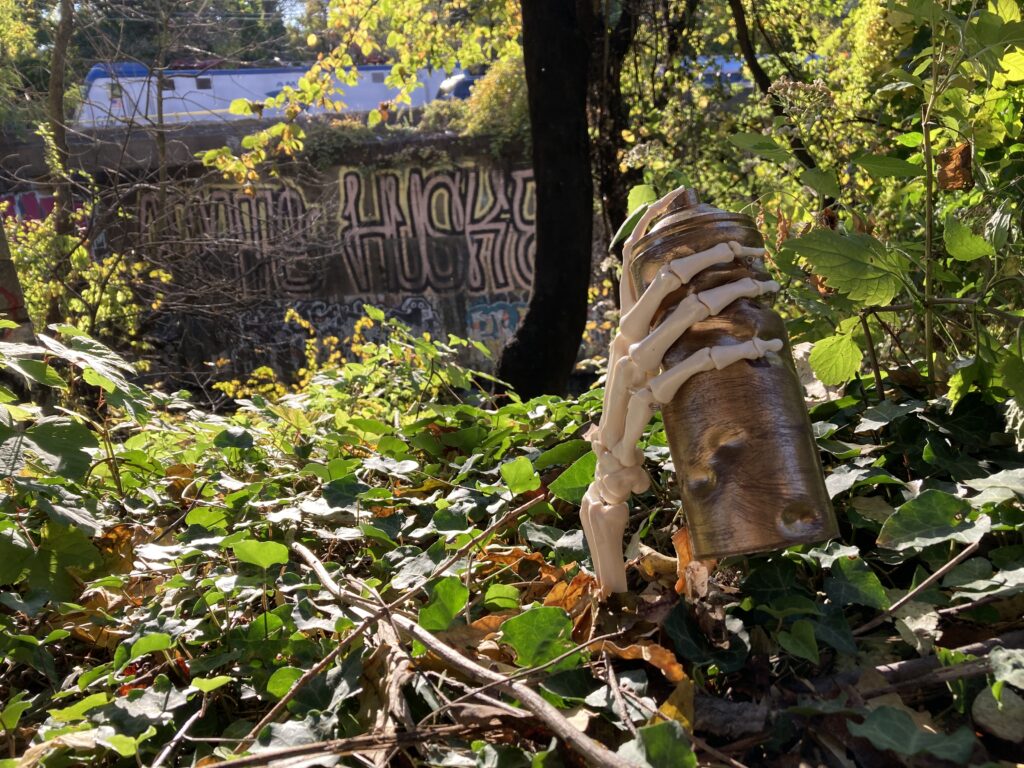
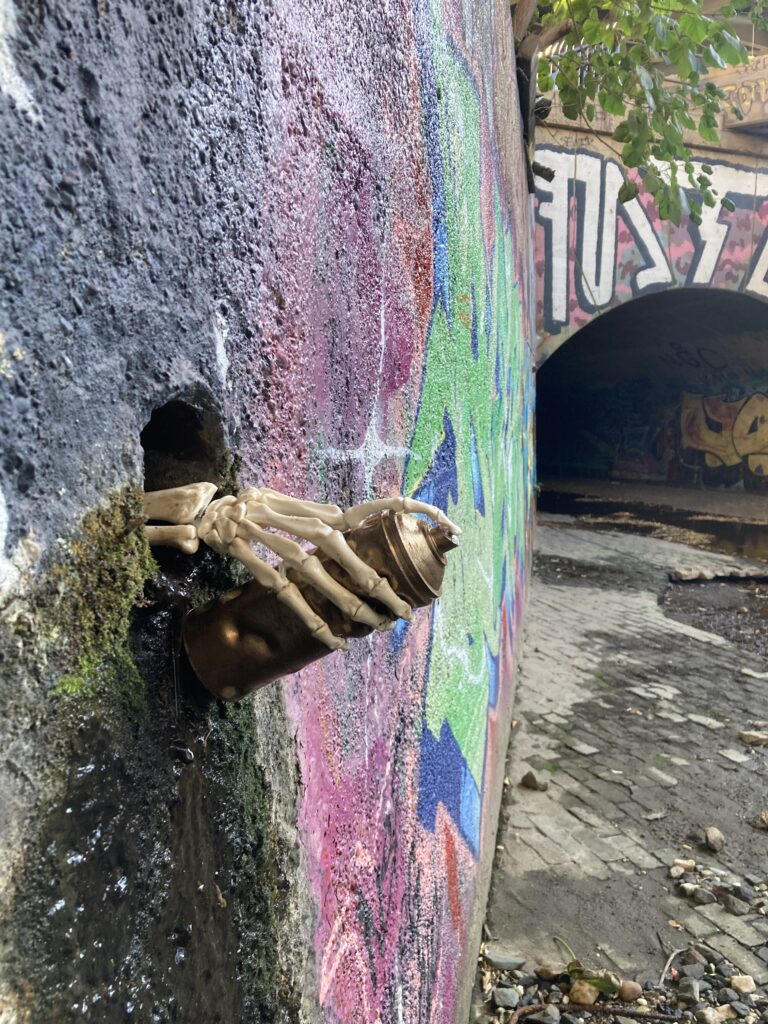
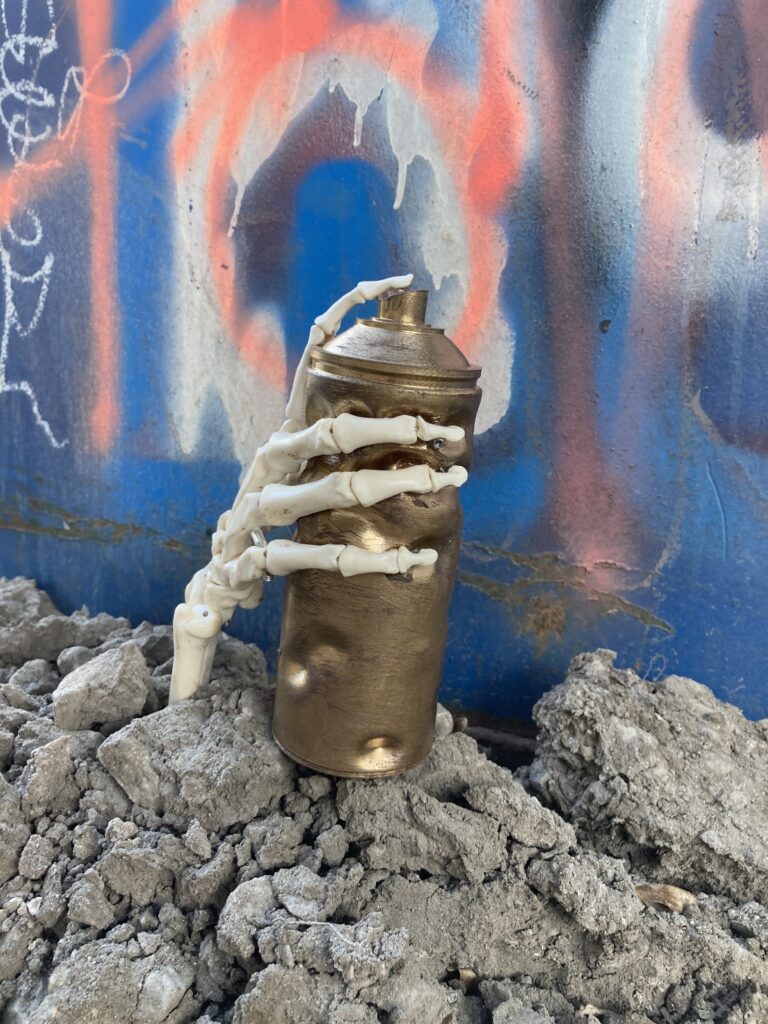
Project II: Skeleton-hand spray can
For this project I chose a spray paint can to 3D model. I had the idea to make the can look like it was old and slightly crushed, and as I was thinking about the secondary object to incorporate I had the idea to make a Halloween yard decoration since Halloween was right around the corner. I found a life-sized model of a skeleton hand (like one you’d find in a doctor’s office) online, and painted the spray paint can gold with a darker undercoat so that I could distress the paint and make it look old and beat up. I attached a couple of home-made acrylic stakes to the arm bones, so that I could stick the hand in the ground, and then photographed it in a few different places where I though it would fit in. All in all this project was a lot of fun to make and document, and I learned a lot about measuring, modeling, and altering an object in Rhino.


Process
First, I took measurements from the spray paint can, and used them to create the shapes needed to model it in Rhino—in hindsight, it would have been easier to create a profile line of one side of the can and rotate it to make the shape, because it would have saved me the steps of boolean joining each shape later. Then, I 3D printed the model I made of the un-altered can. Then, I went back into Rhino and warped the can model to make it look like it was being crushed by a hand (this was difficult because I didn’t have the skeleton hand yet, and had to guess where the fingers would be by holding the can with one hand and making the dents where I though they would be on the model in Rhino. When I printed the second warped model, it turned out that the crushed areas were pretty much exactly where they needed to be. Then I painted the can with a dark brown color as an under coat, and then painted the can gold. I gave it a distressed look by lightly sanding the gold layer to reveal the darker layer underneath, and then I glued the skeleton hand in place, and then attached the stakes I had made out of scrap pieces of acrylic. After our critique, I decided to go for a walk and try to find other places where I thought the hand looked like it belonged. I had a lot of fun exploring some pretty cool places, and also got some pretty cool shots.
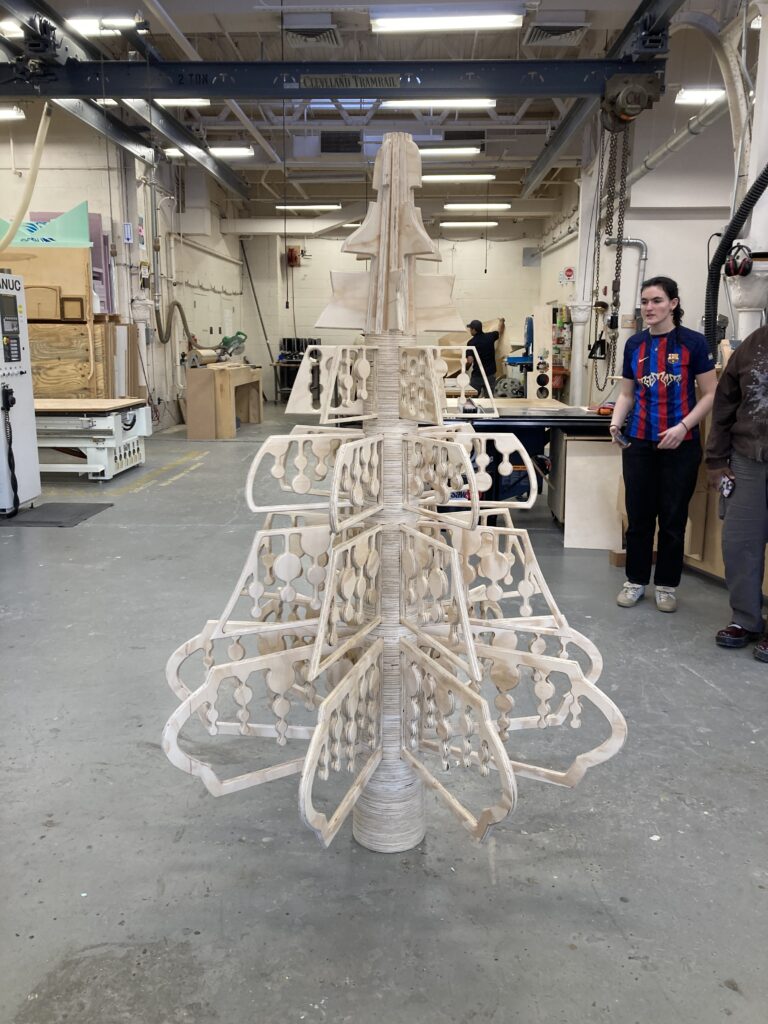
Christmas Tree
For this assignment we worked together as a class to design, CAM, CNC machine cut, and assemble a Christmas tree. It was a lot of fun to work together with the class, and to collaborate with everyone to design and build the tree. I learned a lot about how to assign cutting parameters to shapes and areas to be milled and cut, and it was really exciting to see the final product assembled in front of everyone!

Process
My specific contribution to the process was to take all of the shapes we had to cut and, in Rhino, lay them out on the pieces of plywood for cutting. Then I set up one of the sheets by assigning the particular cutting parameters, and make it so that other people could copy and paste the parameters to the other shapes on the other pieces of plywood. This took longer than I had expected because there were certain things that needed to be tweaked a little once Tim did his final look-over, and I had to make sure that those changes would translate to the other pieces that were going to be cut after the sheet that I had set up. Overall, I learned a lot about how to check the CAM programming and how to make sure that everything will cut the way you want it.
Research
https://dfabclass.com/intro/wp-admin/post.php?post=7064&action=edit
More Information
beneckert.com