The laser cutter is an excellent tool for precision cutting and engraving. In the dFab Studio we have two Universal 75W laser cutters. Files are sent to the laser cutters by “printing” from Rhino, and settings for the laser are controlled by a custom print driver according to specific colors of your geometry. Proper configuration of your Rhino file is key.
Universal PLS 6.75 Overview & Resources
Dimensions: 32″ x 18″, 813 mm x 457 mm
dFab Laser Manual
dFab Laser Quiz
IDF – Small-Objects-Inches.3dm
Laser Cutter Settings
File Preparation Tips
Take the time to organize your files before going to the laser cutter. Remember, Control+Z will not uncut your material, so do all you can to make sure you are using material and machine-time efficiently. It is sometimes useful to create a separate laser cutting file once you have completed your design work in Rhino. Use the Template File or organize your layers thoughtfully, and create designated layers for laser cutting according to the same dFab conventions.
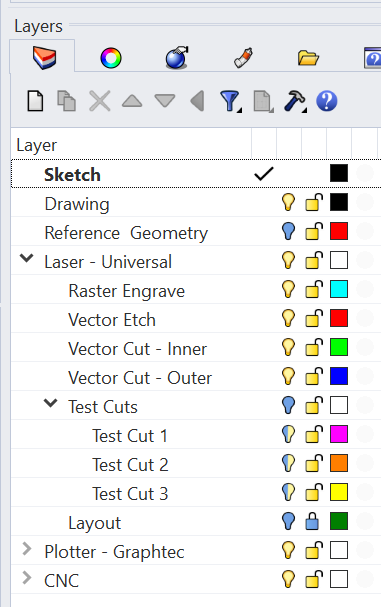
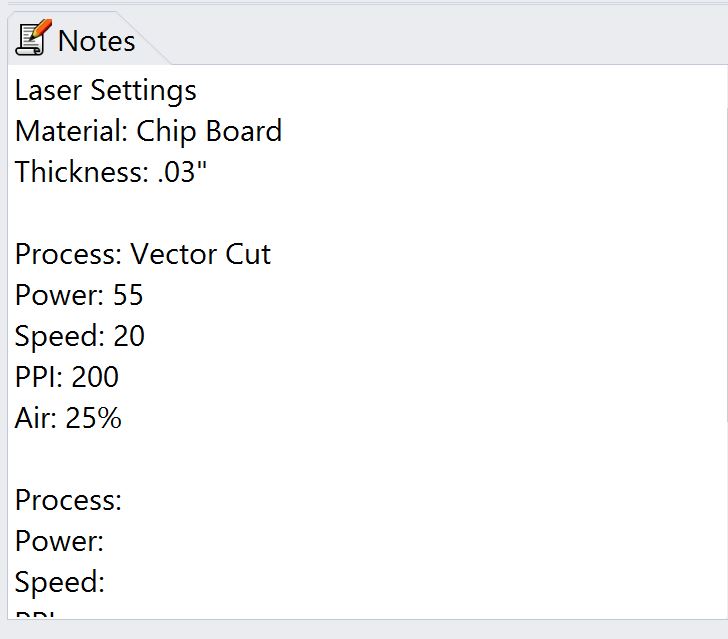
Colors must be set to the true values, which can be easily done using the named colors in Rhino (Black, Red, Green, Blue, Magenta, Cyan, Orange, and Yellow). Any laser process can be assigned to any of these colors, but the conventions shown in the template and image to the right are useful for several reasons and should be followed as a general habit in this class. Raster Engraving is used for images and hatches in Rhino and cyan is the standard color for this process. This is a slow process where the laser will move back and forth, selectively firing the laser to engrave the shape/image into your material. With vector operations, the laser will follow along the curve geometry assigned to that color. Vector etching uses power and speed setting that mark the material without cutting all the way through. Vector cutting uses power and speed settings optimized to just cut through the material. Multiple cut layers are often defined to separate internal and external cuts, preventing misalignments that can occur when material shift slightly when cut loose from the stock. Once you have made tests and finished you laser cutting, following the procedures described in the dFab Laser Manual, remember to record your settings for future reference. The Notes panel in Rhino is a great place to do this. Be sure to save you file with a clear filename.