3D printing is a powerful method of fabrication. As with any tool, it requires the development of skill and and exploration of how it fits into your practice. With attention and work, you will avoid the common pitfalls and common tropes of 3D printing.
Note: Much of the content in this page is taken directly from the Prusa MK3S Manual.
3D Printers in dFab
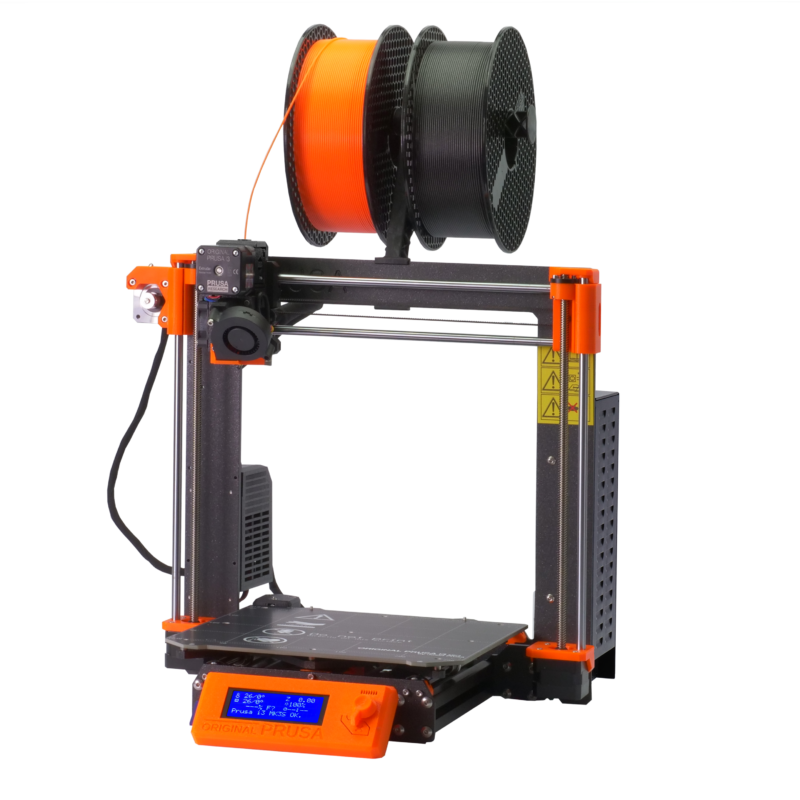
In MICA’s dFab studio, the open-source Prusa printers are are the workhorses for FDM (fused deposition modeling) 3D printing . We have six MK3S printers. The bank of printers in the cabinet are for printing in PLA only. We have other printers designated for alternative materials.
dFab 3D Printer Policies
- All dFab equipment is taught through coursework. Students must take coursework that teaches equipment prior to accessing the 3d printers.
- Watch your print at least until it starts infill after printing the solid horizontal shells on the bottom.
- Write your user name (for example rmckibbin) in dry erase on the door.
- Don’t send prints within an hour of the shop closing.
- Store filament in the plastic bag.
- Buy your own 1.75mm PLA if you are printing a lot.
Design for 3D Printing
All the wonderful freedom of creating in a 3D modeling program can come crashing to a gooey molten halt if you forget that in the world where you are actually making this object there are the wonderfully troubling factors of gravity and physics.
Overhangs and Support Material
The most important thing to keep in mind while modeling for 3D printing is support material. 3D printers can’t print in mid-air, each layer has to be laid on top of the previous layer. When designing, keep this limitation in mind and try to avoid creating steep overhangs. That said, short horizontal bridges can be printed without supports. Also, printing with support material is a feature that has improved dramatically over the past five years or so, and is a viable solution to overhangs in many cases.
Fillet vs Chamfer
If oriented towards the print bed, fillets create a very steep overhang, which negatively affects the surface of the object. For this reason, use chamfer instead if perfect part finish is the priority.

Splitting Model into Multiple Parts
Both visuals and mechanical properties of your model can be improved by splitting it into multiple parts. It’s often better to split a complex object into multiple parts that are easier to place on the print platform. This way, you can minimize the number of supports required. You can then glue the object together.

Thin Walls and Minimum Feature Size
Another limitation is the nozzle diameter. The default nozzle size is 0.4 mm with extrusion width of 0.45 mm. Keep this number in mind, especially when you’re designing thin walls or tiny features.
| Wall Thickness | Printable? |
| Less than one perimeter | NO |
| One Perimeter | YES |
| More than one, but less than two perimeters | NO |
| More than two perimeters | YES |
Tolerances
When you design multiple parts that are supposed to fit into each other, you have to add a small tolerance (a gap). For example, if you want a cylinder to fit inside a circular hole, the cylinder’s diameter needs to be at least 0.1 mm smaller. The good thing about 3D printing is that you can quickly iterate and try which tolerance works best for your application.
| Tolerance | Fit |
| 0.10 mm | very tight |
| 0.15 mm | tight |
| 0.20 mm | loose |
Preparing Your 3D Model with PrusaSlicer
Every digital fabrication process involves a translation from your 3D model to commands for the machine. The machine language for 3D printing, as with many digital fabrication tools, is G-code. To create a G-code file for 3D printing we use software called a slicer, in this case PrusaSlicer. The software has pre-set configurations for the Prusa printers. There are a range of settings that can be modified, some more commonly than others. Once complete, the .gcode file is saved to an SD card and taken to the printer.
Prusa Printer Operation
Operation of the Prusa printers is a user friendly process. It is important to understand a few key concepts and procedures.

The parts of the 3D printer

Printing Process Overview Video
Loading the Filament
Check with your instructor, the Studio Manager, or dFab Tech before loading filament.
Before you can load the filament into the extruder, the printer must be preheated for the correct filament type. If you have the filament sensor or autoloading disabled in the settings, you can manually start the loading process from the LCD menu.
- Press the control knob on the LCD panel to enter the main menu.
- Insert the filament into the extruder.
- Choose the Load filament option in the menu and press the button to confirm.
- If the nozzle is not preheated, the preheat menu will be automatically shown.
So select the filament type and confirm by pressing the control knob. - Wait for the nozzle to reach the target preheat temperature.
- Insert the filament into the extruder and confirm loading by pressing the
control knob.
- If the nozzle is not preheated, the preheat menu will be automatically shown.
- The filament is then loaded to the extruder by the extruder stepper automatically.
If you have the filament sensor and autoloading enabled, preheat the printer and simply insert the filament into the extruder. Everything is automated from this point. Make sure that the filament tip is nice and pointy. The Z-axis will rise in case the current Z coordinate is less than 20mm from the print bed. This will ensure that there is always enough space for cleaning the nozzle.
If your filament is running out during a print, you can easily change it for a new spool. Just go to the LCD menu, select Tune submenu and press Change filament. The printer will pause, the print head will go out of the print area, unload the old filament, and the LCD will guide you on what to do. You can even insert filament of a different color and make your prints more colorful.
Unloading the filament
This procedure is similar to the loading operation. Select Unload filament option from the menu. If the nozzle is not preheated, the preheat menu will be automatically shown. Select the filament type and confirm your selection by pressing the control knob. After the printer reaches the target temperature, press the knob to unload the filament. If the nozzle was preheated, the filament is unloaded immediately.
Preheating
Before loading your print, it is helpful to preheat the nozzle and the bed to the desired temperature. If you forget to preheat the printing nozzle and the bed before printing, the printer will automatically check the temperatures of the nozzle and the bed; printing will start when the desired temperature is reached – that can take several minutes. However, we recommend preheating the printer beforehand as described in “Loading the Filament.” Do not let the preheated printer idle. When a printer is preheated and non-printing, material in an extruder degrades over time – it may cause the nozzle to jam up.
Opening your File
Press the LCD-knob and choose the Print from SD option from the menu, press to confirm and pick the desired model file_name.gcode. The printer will start printing the object. The filename (.gcode) must not contain any special characters otherwise the printer is not able to display the file on the LCD.
Mesh Bed Leveling
Mesh bed leveling is performed before every print. It is also the same procedure that happens in the second round of XYZ calibration. The PINDA probe goes through a number of points in a grid pattern spread across the sheet plate (whether it is a powder coated or smooth PEI does not matter) and measures the distance to the sheet. These points are interpolated and used to create a virtual mesh of the bed. During printing, if the bed is slightly warped, the probe will still precisely follow the surface according to its measured mesh.

Watch the Print
Watch the first few printed layers to be sure filament has attached to the bed properly (5 to 10 minutes). The first layer is critical. After a few layers have printed it is okay to just check on the print intermittently (~30 minutes). Remember that you are responsible for your own print job and for the printer while it is running your job.


Removing the Print
Allow the print bed to cool down after the printing is complete. Different thermal expansion rates of the bed material and the printed plastic help the print to detach and reduces the likelihood of damaging the bed in the removal process. Removing prints from the MK3S is much easier because of the ability to remove and bend the build plate. If the prints still do not want to get loose or you need to bend the sheet too much (which you should not do), try to bend the sheet inwards. Prints on the MK3 must be gently pried from the build plate.
